Second Header(2)

Showing posts with label cookies. Show all posts

Matcha Strawberry Black Sesame Cookies


Aaand I'm back after a long break from blogging! Residency has a way of getting into... life :/ I just finished my pediatric surgery rotation and on transplant now. So between organ harvesting and transplanting, I found myself with some extra time!
I met a lot of awesome people during my peds surg rotation, so I baked a batch of these cookies for them. I've been itching to make something with freeze dried strawberries, since I bought a pack and didn't know what to do with them. So on a whim, I thought matcha, strawberries and black sesame would go so well together. The cookies have a more cake like texture in the middle from the extra yolk and a fruity and nutty taste. They were quickly gobbled up by the residents!

Matcha Strawberry Black Sesame Cookies

Makes ~30 cookies

2 cups all purpose flour
1 tbsp matcha powder
1/2 tsp baking soda
1/2 tsp salt
1/2 cup packed brown sugar
1/2 cup + 2 tbsp granulated sugar
3/4 cup unsalted butter, melted
1 tbsp vanilla extract
1 egg
1 egg yolk
1 cup freeze dried strawberries, coarsely chopped
3 tbsp black sesame

  1. Preheat oven to 350F. Grease baking sheets or line with parchment paper
  2. In a large mixing bowl, sift flour, matcha powder, baking soda and salt
  3. In a medium bowl, melt butter and then beat in sugar (brown and white), vanilla, egg + egg yolk
  4. Mix dry and wet ingredients until everything is just incorporated
  5. Fold in freeze dried strawberries and black sesame. Use a heaping teaspoon and place dough on prepared baking sheet about 1 inch apart. The cookies don't spread much
  6. Bake until edges are just golden brown. Cool on rack for at least 10 minutes
Read More

Surgical Brownie Conversation Heart Cookies


Woot! I'm back after a few months of slaving away and studying for the in-training exam. I wish I had more time to bake, but I'll take what I can get! I'm writing this post on my last 27hr call on SICU and I thought I would go ahead and bake ahead for Valentine's day. So I made these brownie conversation heart cookies with some funny surgical pick up lines.
 My fave has probably got to be "You look post call", which I've been pretty much looking like daily :(. I don't usually wear anything than skin care on my face, which I thought was okay, but the nurses have been telling me I look sick today 😰😰... so I guess not??
Anyhoo, I hope you enjoyed these as much as I enjoyed making them! Happy Valentine's Day!


Surgical Brownie Conversation Heart Cookies

makes 15 three inch cookies and many small ones

1 stick butter, at room temp
3/4 cup white sugar
1 medium egg
1 tsp vanilla
1 cup flour
1/2 cup cocoa powder
3/4 tsp baking powder
1/8 tsp salt

Frosting
1 cup powdered sugar
2 tbsp whole milk
1 tbsp light corn syrup
coloring of choice

  1. Cream butter and sugar together until light and fluffy in a stand mixer. On low speed, add egg and vanilla
  2. Place all dry ingredients, flour, cocoa powder, baking powder and salt into the mixer and mix on medium speed until well incorporated. Scrape down sides with a spatula if needed
  3. Wrap the cookie batter in plastic wrap and refrigerate for at least 2 hours or 15 minutes in the freezer. I left mine in the fridge overnight
  4. Preheat oven to 375F. Let dough rest on the counter for 5-10mins. Roll out dough between baking paper or silicon mat for easy lifting. Otherwise, sprinkle a mix of flour and cocoa powder to prevent sticking while rolling. Roll to about 1/4" thick
  5. Cut out shapes and place on a pan prepared with a baking mat or paper. Bake for about 8-10 mins and let it rest on the pan for at least 5 minutes before transferring to a wire rack
  6. Once cookies are completely cooled, whisk frosting ingredients together. Place into a small piping bag and decorate cookies. Leave to dry for at least 2 hours


Read More

Matcha Cinnamon Apple Scones


Whoa! It's been way too long since I updated the blog. Honestly when residency started, I thought I would never come back to it because on the little free time I had off I just wanted to veg on the couch or sleep. I'm now on night float so I've been able to make things during the day and werk, werk, werk all night.

I'm also updating just in time too for my favorite season! I love, love sweater weather and all things cinnamon and pumpkin spiced. For my comeback, I've made these matcha cinnamon apple scones that were adapted from King Arthur Flour.
 Unfortunately the weather was rainy and dark, so these pictures aren't the best :(


Matcha Apple Scones

makes 16 mini scones

2 3/4 cups all purpose flour
1/3 cup white sugar
3/4 tsp salt
1 tbsp baking powder
1 tsp cinnamon
1 tbsp matcha (I used panatea culinary grade matcha)
1 stick cold butter (cut into pieces)
1/2 cup finely diced apple
2 large eggs
1 tsp vanilla extract
1/2 cup apple sauce

turbinado sugar to top
Icing sugar mixed with a little milk

  1. In a large mixing bowel, mix flour, sugar, salt, matcha, baking powder and cinnamon. Cut cold butter into dry mix until crumbly. You'll have some larger chunks of butter but that's okay!
  2. In a small bowl, whisk eggs, vanilla and apple sauce. Add wet to dry ingredients, toss in chopped apple and stir until just moistened
  3. Line pan with silpat or parchment paper. Flour surface and your hands. Divide dough, which is pretty goopy) in half and pat each half into a 6" circle about 3/4" thick
  4. Brush each circle with milk and top with turbinado sugar. Cut each circle into 8 wedges and pull them apart from each other just a bit so there is some space
  5. Place scones uncovered into freezer for 30 minutes. This is important for best texture and rise!
  6. Preheat oven to 425F. Bake scones 20-24 mins or until edges are slightly golden brown
  7. Cool briefly on pan before transferring onto rack.
  8. I mixed some powdered sugar with a little milk to glaze on top

This post was sponsored by panatea matcha. I was provided products to use, but all opinions are my own.
Read More

Matcha Linzer Cookies with Lemon Curd


It's time to shower a little love to all the mums out there! My mum knows I love to bake, so whenever I come home to LA she makes me bake so much bread I sometimes feel like an overworked baker 😓. And that doesn't include all the sweet treats I make for her Sunday church meetings!
But, I love watching my mum ooh and aah over the things I make and the hard work totally pays off. Besides, whenever I'm home I have sooooOoo many demanding requests for home cooked foods. I guess I shouldn't really complain about a tray or two of cookies 😜. I love these cookies because they're not too sweet due to the matcha powder and the zing of lemon curd just brightens them up! My whole family gobbled them up in no time.

Matcha Linzer Cookies with Lemon Curd

adapted from allrecipes.com
makes 20-30 cookies

Cookies
10 tbsp butter, unsalted, softened
2/3 cup white sugar
2 cups all purpose flour, sifted
1 3/4 cups almond flour
3/4 tbsp matcha powder
1 tsp vanilla extract

Lemon Curd
1/2 cup fresh lemon juice
zest of 1 lemon
1/4 - 1/2 cup sugar
6 tbsp butter, unsalted
2 large eggs
2 large egg yolks

  1. For the lemon curd: Whisk all ingredients in a small pot and heat on medium - medium low flame. Continue to whisk until it has thickened considerably and will stick to your whisk (about 5-10 mins). It will cool even further when placed in the fridge, so no worries. Cover layer with plastic wrap once off the heat and let cool. Place in fridge once at room temperature.
  2. For cookies: 
    • Beat butter and sugar together until light and fluffy in standup mixer. Add flour, almond flour, matcha and vanilla. Stir until all ingredients just becomes into a stiff dough
    • Split dough in half and roll to 1/8 inch thick on floured surface between wax paper. Place into refrigerator for at least 2 hours or place in freezer for 15 mins
    • Preheat oven to 325F. Line baking sheet with parchment paper
    • With a 2 inch linzer cookier cutter, cut out as many circles as you can. Knead leftover scraps of dough into a ball and roll out again on floured surface. If the dough becomes too soft, you can always place in freezer. The dough can be quite sticky and difficult to handle so freeze often!
    • These don't spread in the oven so you can place them a little less than 1 inch together. Refrigerate any trays of cookies while working on remaining dough
    • Bake cookies until lightly brown on the edges, 9-12 mins. Let cool in tray until they stiffen for 5 mins and then cool completely on wire rack
  3. Assembly: spread a coating of lemon curd on each cookie round and press two together to make a sandwich

Read More

Nutella Stuffed Almond Cookies


Only two more weeks and 3 days until match day! I think I should be more nervous about where I end up, since I've been hearing my friends lose sleep over this. But my mind has been on vacay-mode for more than 4 months, so it is pretty much mush :/
Because I am still going strong with breaking New Year's resolutions to eat healthy, here are some Nutella stuffed Almond cookies!

Nutella Stuffed Almond Cookies

makes 1-2 dozen

1 stick butter, softened
1/2 cup white sugar
1/2 cup brown sugar
1 egg
1 tsp vanilla
1/2 tsp baking soda + 1 tsp hot water
1/4 tsp salt
1.5 cups flour

1/2 cup flaked almonds
1/2 cup nutella
  1. On a piece of parchment paper or silpat mat, spoon about 12-15 half tablespoons of nutella and put in the freezer
  2. Preheat oven to 325F
  3. Cream butter and sugars. Beat in egg and stir in vanilla
  4. Dissolve the baking soda in hot water and add to the batter. Add salt and mix until combined
  5. Stir in flour just until a dough forms. Fold in almonds.
  6. Roll into 1-2 inch balls, then flatten and place a frozen nutella ball in the middle. Seal it like you would fill a dumpling, roll back into ball shape and place 1" apart on a lined baking tray. Dough will not spread much, so if you want a thinner crispier cookie, flatten it a bit
  7. Bake for 10-15 mins, just until edges are brown (not to a crisp!)

Read More

Mochi Stuffed Almond Cookies - 찰떡쿠키


Chinese new year is just right around the corner and soon it will be the year of the monkey!! This is one of my fav holidays, because it represents new beginnings, good food and merriment with the family. Back in Hong Kong, we used to get a week break from school and the day would start with wearing new red colored clothing, taping all kinds of good omens written on red paper on our doors and walls. Then we would go about town visiting friends and families to wish them a happy new year and to collect red envelopes full of money! I never did get to see where all that money went, since my mum said she would "safe-keep" it for me :/
I really miss the CNY atmosphere in Asia. People are super happy and the whole city is decorated in all kinds of red colors including red building lights, red candles, and red lanterns. Everyone is singing CNY songs and wishing each other luck for the new year and there are lion dances and fireworks going off in the background. The typical new year foods are so so so good. Usually there is a mochi/rice cake dessert called nian gao, literally meaning "higher year" and so it's lucky for every household to eat it during cny so that their whole year will be very prosperous. I've kind of adapted the traditional Chinese almond butter cookies and added a gigantic mochi filling in the middle so that you too can have some lucky cookies for the new year :D!
Here are some blogger friends who decided to take a spin on Chinese New Year cookies. Check them out below!


Mochi Stuffed Almond Cookies - 찰떡쿠키

makes 10 cookies

1 cup flour
1 tbsp cornstarch
1/2 tsp baking powder
1/4 cup sugar
1/4 tsp salt
1 egg
1 tbsp condensed milk
1 tsp almond extract
3 tbsp butter, melted
egg wash + almonds

Filling
1 cup glutinous rice flour (mochiko)
3 tbsp sugar
1/2 tsp salt
3/4 cup whole milk
  1. Preheat oven to 350F and prepare greased baking tray or line with parchment paper
  2. In a large bowl, mix flour, cornstarch, baking powder, sugar and salt. In a medium bowl, melt butter and then beat in sugar, salt, condensed milk, almond extract and lastly a beaten egg. Mix dry and wet mix together until you get a smooth yellow dough. Wrap dough in seran wrap and let it rest while you make the filling
  3. For the mochi filling. In a medium bowl, mix mochiko powder, sugar, salt and milk. Microwave on high for about a minute. Take out to mix with a heat proof spatula (be careful because it will be hot). It won't be done yet, so microwave for another minute. It is done when it looks like one block of white mochi. Protect your hand with gloves or use the spatula to cut out 10 equal sizes of mochi (or let it cool a little first haha)
  4. Once your cookie dough has rested for about 20-30mins, evenly divide into 10 balls. Flatten balls of dough in your hand, place mochi in the center and wrap around. It will take some molding with your hands to get it around the mochi. Repeat for the other cookies
  5. Make egg wash with a beaten egg and brush on top of cookies and press in an almond
  6. Bake for 10-15mins or until golden. Cool for 5 mins before eating. You can keep remainders in a ziploc bag in the fridge, but the mochi will harden and the cookies will need to be microwaved for 20-30secs to soften it again!
Read More

Matcha Crinkle Cookies


So excited my favorite holiday is coming up! I especially love the cold weather, because I can layer and layer and layer clothing and you will never see how much weight I'll be gaining from all the Christmas treats :P. I can't tell if it's the cold weather that makes me so hungry, or I just get enticed by all the creative spicy and chocolate-y names people come up for xmas treats or how pretty they look.
The only thing I don't like about the holidays is that my birthday falls a few days after. Which means I only get ONE present for both christmas and my birthday :( I think I've been complaining about this every year since I was born (yes really, right out of the womb). Also, back in the days, I had to share a birthday with my twin, so my six year old self was obvi not too happy with only half the attention :P. Now that I'm super old and don't have parties with clowns and balloons like I used to, I'm totally cool with it (maybe, maybe not haha).
Anyway, finally time to get started on baking holiday cookies myself! It's been a while since I've added something to my matcha recipe list, so I added matcha to one of my fave chocolate crinkle cookies! They're really chewy and fudge-y and not tooth-achingly sweet. They keep pretty well in a sealed container and make beautiful presents for cookie-swapping.

Matcha Crinkle Cookies

adapted from bettycrocker
makes 2 dozen cookies

1/4 cup vegetable oil
2-3 oz white chocolate chips (~about 1/4 cup)
1 cup granulated sugar (minus about 2 tbsps)
1 tsp vanilla
2 eggs, at room temp
1 cup + 2 tbsp all-purpose flour
1 tbsp matcha powder (using Panatea culinary grade matcha)
1 tsp baking powder
1/4 tsp salt
powdered sugar (about 1/2 cup)

  1. In a mixing bowl or large bowl, mix flour, matcha powder, baking powder and salt.
  2. In a medium sized boil, melt chocolate chips over hot water. I have a lot of trouble melting white chocolate in a microwave. I don't know why it doesn't melt as easily as real chocolate. I guess fake chocolate is just annoying like that! So I place a medium boil over a small pot with water and melt it slowly like that. Let it cool for a bit, then add sugar, oil, vanilla and beat in the eggs
  3. Stir in white chocolate mixture into the dry ingredients. Mix until well incorporated. But don't over-beat like crazy :P. Your batter may seem pretty goopy and you will even question if it is really a cookie batter and not a semi-cake batter. But trust me, it will stiffen in the fridge! Cover and refrigerate overnight (or at least 4 hours).
  4. Line baking pan with a silicone mat or baking paper
  5. Prepare a shallow bowl with powdered sugar. Roll about 2tsp of dough into a ball with your palms and drop into powdered sugar. Roll around powdered sugar to coat fully. Place on cookie sheets about 2 inches apart. These will really spread.
  6. Place pan in the fridge for a bit while you preheat the oven to 350F. Once the oven is ready, bake for 11-14mins or until the edges barely get a little golden. Immediately remove the cookies from the pan. I simply slid my silicon mat off the pan and onto a wire rack.

Read More

Mammo S'mores


I'm almost done with internal med!  I just wanted to do a quick post because I don't really have much time, but I had to post this for October. As you know October is breast cancer awareness month and since I've been learning and meeting so many patients who are survivors during my radiation oncology elective, I really wanted to make something that kind of represented my time there. This was also my final project for my elective course... 
Who would have thought med school would actually have me bake and make metaphors out of patient care. So cool!
I'm so thankful for all the patients I met on my rotation. Sometimes it was difficult seeing what they had to go through, but sometimes it was so exhilarating to talk to the most positive patients I have ever met. These ladies were true survivors. I really don't do any justice by writing so little about my experience, but I will elaborate on it later. For the mean time... please enjoy the mammograms. (Also, if you are 40+, please consider getting one if you haven't already :P)
Mammo S'mores
makes 30 assembled s'mores
adapted from kitchenfrau

Booby Marshmallows
1 cup water (divided)
2 packages gelatin (about 4.5 tsps)
2 cups white sugar
1.5 tsp vanilla
1/8 tsp salt
red food coloring
powdered sugar
corn starch
  1. Prepare a 9x13" pan by lightly greasing with butter and powdered sugar. Tap out excess powdered sugar from pan.
  2. Stir 1/2 cup of water with gelatin and allow to bloom (it should be like a clump of jelly fish :/)
  3. Meanwhile heat sugar and the other 1/2 cup of water in a small pot until dissolved. Add the gelatin into the pot and bring to boil while stirring. Once bubbling, take off heat, add salt and stir (make sure sides are scraped down as well). Cool to room temp
  4. Once cool, add vanilla and pour into a stand mixer (the cooled mix will look translucent and yellowy). Beat on high for 6 mins, the coagulated stuff will magically turn white and fluffy! Stop and add red food coloring until you see a pink tinge (like a tiny squeeze from the tube) and beat for 2-3 mins more
  5. Dump into prepared pan. I mean dump, because the mixture will be sticky and difficult to handle. Smooth out layer as even as you can. Let cool and dry overnight
  6. Cut into desired shape: I cut it into squares and then cut out the curved "boobs" part with a stiff curvy piece of plastic. Always wipe your knife or plastic when slicing so it doesn't stick too badly. Toss marshmallows into powdered sugar or corn starch (or a mix of both). Allow to dry on a rack for a few hours
Graham crackers
Recipe here!
Assembly
- I used nutella as my (chocolate layer), but a ganache dark chocolate layer would put this over the top!
- For the 'nips', I mixed a little bit of powdered sugar with red food coloring and water. Then I dotted them with a chopstick.
Read More

Lotus Seed and Salted egg yolk cookie sandwich

Happy Mid Autumn Festival! This is the time to light up lanterns and stuff your face with mooncakes. When I was young, my dad used to buy me all kinds of pretty lanterns that we would light up and hike up a hill to see the full moon. He also bought me ones that sang, but I bet he regretted that because I would play it all night until the song started to get out of tune and was really painful to the ears :D
My sister and I were also pyromaniacs back in the days and would line up waxy red candles on a mooncake tin lid and make a bonfire. Things were so simple back then haha. What I really miss the most is eating mooncakes though. Friends and relatives would gift traditional mooncakes and I loved opening them up to see the intricate design on top and then to cut it open to reveal the golden yolk in the center. I could eat a whole one and it would sit like a brick in my stomach all day (you should weigh one of these, they are so heavy!)
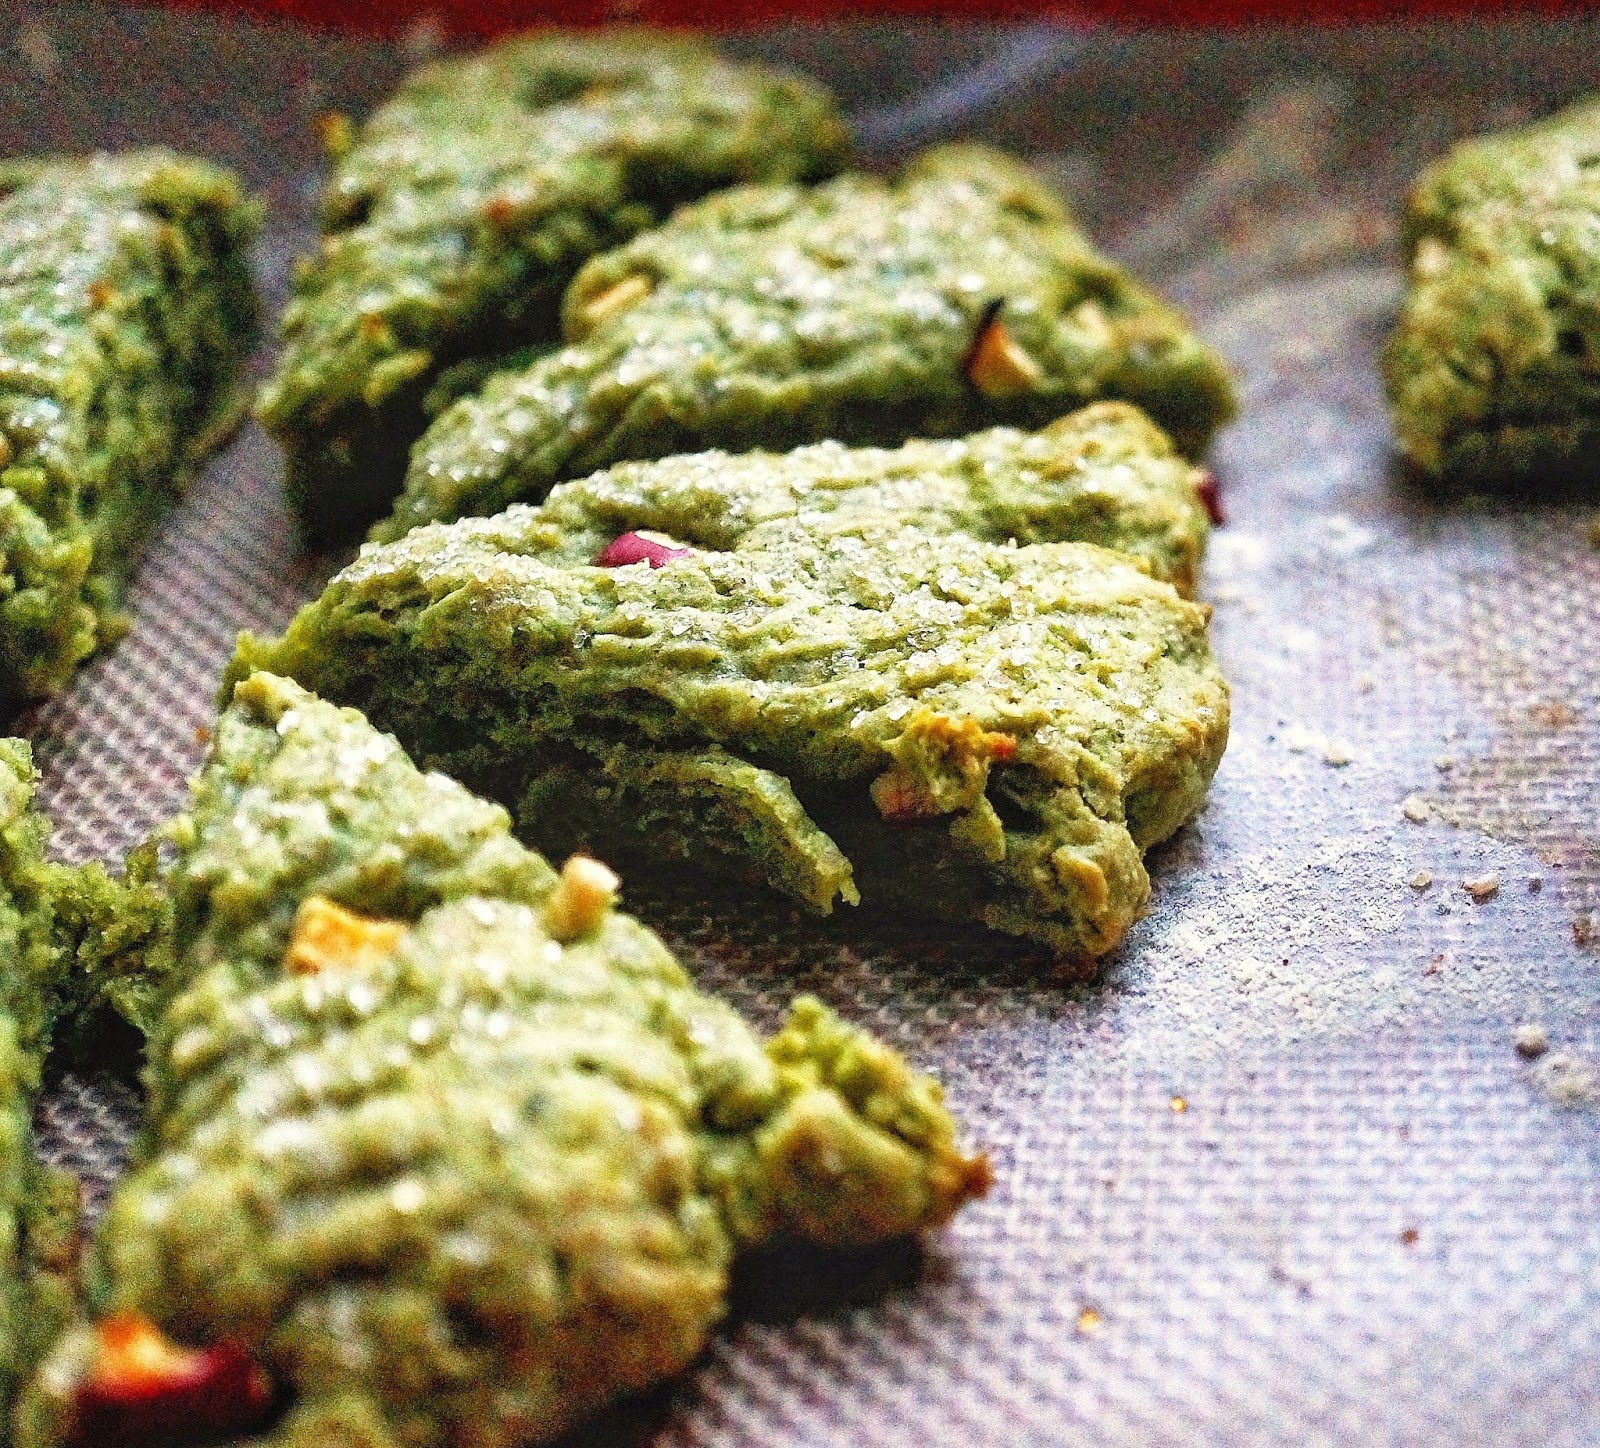
Anyway, I decided to create something mooncake-like and made some mooncake cookie sandwiches. It took me a month to make these, because I made my own salted eggs which took about a month of endless waiting (recipe below). The cookies are studded with salted yolks throughout and are so buttery and crumbly. They are sooo good on their own, that my bf kept eating them and I didn't have many left to sandwich >:( . I'm excited to eat these and watch the full moon today!
Lotus Seed and Salted Egg Yolk Cookie Sandwich
makes 15-20 cookie sandwiches

2 cups flour
4 tsps cornstarch
1/4 tsp baking powder
1/8 tsp baking soda
1 tbsp dried milk powder
3/4 cup salted butter, room temp
1/3 cup white sugar
2-3 tbsps maple syrup
3 salted egg yolks, cooked* (how I made the salted eggs below)

egg wash
black and white sesame seeds (optional)
sweetened lotus seed paste
  1. Place salted eggs in pot and cover with water and put on high heat. When it starts boiling, start the timer to let it boil for 4.5 minutes. Once time is up, take it off the heat and dunk in ice cold water.
  2. Sift flour, cornstarch, baking powder and soda and milk powder in a large bowl and set aside. Beat softened butter with sugar until light, stir in maple syrup. Stir dry mix to wet ingredients gently, until it comes together into one lump of dough. (if the dough doesn't come together, add a little bit of vegetable oil)
  3. Spoon out cooked egg yolks (some white is fine), and crumble coarsely with a fork. Fold into cookie dough. Make sure you have some chunks scattered throughout, because it is absolutely divine to taste the salted yolk here and there in the buttery cookie.
  4. I used mooncake molds to get the cool flower pattern on top. But if you don't have one, then roll out dough to 1/4" thick. Cut out to any shape you want. Place on lined baking trays and chill them for 30minutes.
  5. Preheat oven to 350F. Beat 1 egg to make the egg wash. Brush liberally on top of cookie cut outs. Sprinkle on black and white sesame seeds if desired.
  6. Bake for 18-22mins or until nicely golden on top. Let it cool at least 10 minutes on the tray before moving because they are pretty fragile out of the oven.
  7. You can definitely make your own lotus seed paste or buy a can of it in your local Chinese supermarket. Pipe some onto the cooled cookies and sandwich them. 
*I actually made my own salted eggs using extra-large chicken eggs, instead of the traditional duck egg. You just need a ratio of 1:4 salt to water ratio (so 1 cup salt for 4 cups of water), and place your eggs into the mix. I also placed a ziploc filled with water on the top, so the eggs wouldn't float in the salty water. I then put a lid on it and stored it in on top of my fridge for a month. The yolks when cooked came out really nicely bright orange/red and salty :D

Read More

Matcha Pocky Sticks


I'm back with another matcha recipe! I know...NOT another one! If I'm doing too many, lemme know :P. I can't promise you that'll stop me, but I'll consider it ;) I was going to post this on November 11, because that's Korea's Pepero day (11/11). Pepero (빼빼로) is the Korean name for the Japanese Pocky. It's kind of like Valentine's day, but you buy your crush or significant other pepero. I don't really know the reason why, but you just do it because pepero is freaking addictive to snack on.
I just thought that straight stick pocky is kind of boring, so why not make all kinds of pocky shapes and sizes? With a homemade squeezable dough, you can make glasses, hearts, stars and everything else. These are so much more fun to gift (or to eat by yourself :D).
Matcha Pocky Sticks
adapted from food52
makes about 50 sticks and shapes

4 tbsps unsalted butter, at room temp
1/4 cup white sugar
1 large egg
1/2 tsp vanilla
1 cup bread flour
1/2 tsp baking powder
1/4 tsp salt
1-2 tbsp water
1.5 cup white chocolate chips (or 9 oz)
toppings: black sesame seeds, shredded coconut, sprinkles (optional)
  1. Preheat oven to 300F. In a mixer, beat butter and sugar until fluffly. Stir in egg and vanilla on medium. Add flour, baking powder and salt and stir, then add water until a smooth dough forms (you may need to add more water if too stiff). Dough should feel malleable, otherwise it will be extremely difficult to pipe
  2. Transfer dough into a pastry bag fitted with a 1/4" tip. Pipe onto parchment paper into straight lines, hearts, glasses...whatever you like!
  3. Bake for 18-20mins or until golden brown around the edges. Allow to cool and harden for 5 minutes before transferring onto a rack to cool completely
  4. Melt white chocolate in a water bath. I have really bad experiences with microwaving white chocolate...real chocolate seems fine but white just doesn't work for me! Just place the chocolate chips in a small tall bowl into small pot with constant warm/hot water. Once it melts, whisk in matcha powder
  5. Dip and spread your shaped cookie sticks into the melted chocolate. Scrape off gently any excess chocolate and lay on silicon mats or baking paper. Decorate with toppings.
  6. Let chocolate harden or transfer to the fridge to quicken the process

Read More

Homemade Matcha-mallows S'mores


A quick hello before I go to sleep (I guess goodnight?)! I'm kinda excited to share a marshmallow recipe with you guys, that contains no corn syrup! Honestly, I don't know what's up with all the bad hype about corn syrup and don't want to read about it, since I already have to read about bowel obstruction for my patients (hehe sorry). I've been meaning to make marshmallows, so I actually bought a bottle of corn syrup, but found a recipe just using sugar. Now, I have no idea what to do with the corn syrup :/
The addition of something bitter/earthy like matcha to marshmallows is such a genius move. Usually, I find marshmallows way too sweet and absolutely will not eat them unless sandwiched in s'mores. This was before I made some homemade ones. I kid you not... they are like fluffy pillows that instantly melt in your mouth. You can eat so many of them, because they aren't too sweet and I guess they're somewhat healthy (because of matcha???).
I'm excited to introduce you guys to the culinary matcha that I've been incorporating into new recipes you'll be seeing more soon! I'm super in love with matcha!!! I could run to the rooftop and shout out my love for it! It has such an unique earthy and healthy quality to it, I find myself sprinkling it on everything.

I have a whole recipe gallery dedicated to matcha! If you want to try it, I'm partnering with Panatea and offering 10% off their culinary grade bag (Code: mhpculinary)

They also have awesome matcha tees and tanks for those super matcha-afficionados. I've been debating on getting some, but they've run out of the smallest sizes D:

Homemade Matcha-mallows S'mores
makes 30-40 s'mores
adapted from kitchenfrau

Matcha marshmallows
1 cup water (divided)
2 packages gelatin (about 4.5 tsps)
2 cups white sugar
1.5 tsp vanilla
1/8 tsp salt
2-3 tbsps Panatea's culinary grade matcha
powdered sugar
corn starch
  1. Prepare a 9x13" pan by lightly greasing with butter and powdered sugar. Tap out excess powdered sugar from pan.
  2. Stir 1/2 cup of water with gelatin and allow to bloom (it should be like a clump of jelly fish :/)
  3. Meanwhile heat sugar and the other 1/2 cup of water in a small pot until dissolved. Add the gelatin into the pot and bring to boil while stirring. Once bubbling, take off heat, add salt and stir (it will turn whitish and make sure sides are scraped down as well). Cool to room temp
  4. Once cool, add vanilla and pour into a stand mixer (the cooled mix will look translucent and yellowy). Beat on high for 6 mins, the coagulated stuff will magically turn white and fluffy! Stop and add matcha powder and beat for 2-3 mins more
  5. Dump into prepared pan. I mean dump, because the mixture will be sticky and difficult to handle. Smooth out layer as even as you can. Let cool and dry overnight
  6. Cut into desired shape: I cut it into squares and circles to the size of my crackers. Always wipe your knife or plastic when slicing so it doesn't stick too badly. Toss marshmallows into a half and half mix of matcha and powdered sugar or corn starch. Allow to dry on a rack for a few hours

Graham crackers
1.5 cups all purpose
1 cup whole wheat
3/4 cup light brown sugar
1 tsp baking soda
2 tsp cinnamon
3/4 tsp salt
1 stick frozen butter (cut in tbsps)
1/3 cup honey
1/3 cup whole milk
2 tbsp vanilla
  1. Pulse flours, sugar, baking soda, cinnamon and salt in a food processor just to mix. Add frozen butter and pulse until you can see small pea-sized lumps amongst the dry mix
  2. Whisk honey, milk, and vanilla to food processor and pulse until dough comes together. You can take it out and knead the dough so it forms a ball. It will be soft and sticky. Cover with plastic wrap and stick in the fridge for at least 2 hours
  3. Roll out dough on floured surface and roll to slightly thicker than 1/8". Cut into squares of desired size (I did 1.5x1.5"). Place on silicon mat or parchment paper. Prick cut graham squares with a fork. Chill for at least 30 mins
  4. Preheat oven to 350F and bake chilled crackers for 18-24mins or until nicely browned on the edge. Cool on rack
Assembly
- I used nutella as my (chocolate layer), but a ganache dark chocolate layer would put this over the top!


Read More

Oreo Cheesecake Brownie Bars


Ah... It feels like I haven't been posting for a while! I swear I've been sweating it up in the kitchen baking, cooking and testing out recipes. I have so many posts lined up that I'm super excited about, so I promise I'll have it up soon. But, for now I'm going to post something I made last year. Haha oops. I've been meaning to post these oreo cheesecake brownies that I made when I just felt I needed the ultimate indulgence. It isn't one of my usual East-meets-West recipe, but sometimes there are foods like cheesecake brownies that you just can't tamper with.
Do make these and save them in the fridge so you can have them on one of those long and exhausting days. Or if you're like me and you become cookie monster at a certain time of the month ;) 

Hopefully I'll be able to post some cooler recipes soon! 

Oreo Cheesecake Brownie Bars
makes one 8x8" pan

Brownie
1 stick butter, melted
3/4 cup sugar
2 eggs
1 tsp vanilla
1/3 cup unsweetened cocoa powder
1/2 cup flour
1/4 tsp salt
1/4 tsp baking powder
1/2 cup semi-sweet chocolate chips

Cheesecake
2 - 8oz packages cream cheese, room temp
1/4 cup white sugar
1/4 cup sour cream
1 tsp vanilla
About 1 cup crushed Oreos
  1. Preheat oven to 350F. Line pan with parchment paper
  2. Brownie: mix wet ingredients (melted butter, sugar, eggs, vanilla), gently stir in the dry ingredients (cocoa, flour, salt, baking powder) and just mixed. Fold in chocolate chips. Pour batter into the pan. Smooth out if necessary.
  3. Cheesecake: Whip cream cheese until light and fluffy. Whip in the sugar, sour cream and vanilla. Gently fold in the crushed Oreos.
  4. Carefully pour cheesecake batter over the brownie batter and smooth the top
  5. Put in the oven for 20mins (do not open the oven door). Lower the oven to 325F and bake for another 20 mins. Again (DON"T open the oven door), lower temperature to 300 and bake for 10 mins
  6. Now crack open the oven door just a little bit, turn off the oven, and let it sit for 30-40mins. Let it cool and then stick it in the refrigerator for at least 2 hours.


Read More

Matcha Checkerboard Shortbread Cookies

Ummah 엄마 - that's what mothers are called in Korean. And I love my ummah and she loves me like crazy (well... most of the time :P). When I lived at home before college, I wanted to get out of the house as soon as possible. My mum was one of those tiger mum types. If I slept at midnight, she'd yell and tell me that while I was sleeping there were other kids up way past 2am with bleeding noses because they were studying so hard. My mum expected us to use encyclopedias as pillows and to study until the crack of dawn. Every night, she would camp out on the living room sofa and my sister and I would come out of our rooms to study on the living room table so she could keep an eye out on us. Of course, by 11pm she'd be fast asleep on the couch, except you could never tell because she sleeps with her eyes open!


Sometimes, we'd take turns to wave a hand in front of her face and make sure she's sleeping. If we were lucky, we would hop straight into bed and then hear our mum a few hours later waking up groggily and walking back to her room :P. We'd hold our breaths until we heard the squeak of her mattress sink under her weight. Sometimes, we weren't so lucky in our endeavors... And when you have a mother who sings soprano at a Korean community church, you can be sure you'll be hearing that voice for miles. Thinking about it, my sister and I probably really needed an iron fist when it comes to studying, because we were such lazy kids haha...


Despite the draconian studying, our mum was always looking out for us. Every summer when I left Hong Kong for Houston, I lugged two very full suitcases; one filled with my clothes and another filled with all my favorite home-cooked foods. She was always so worried I would starve myself even if I was already on a meal plan in college. Needless to say, my suitcases were always overweight or needed extra time in security, because I was carrying stinky things like kimchi (scared the sniffing dogs) or suspiciously dense frozen blocks of Korean rice cakes. By the time I was going to graduate, I had enough food left over in the freezer for a zombie apocalypse. But, now I'm so grateful that she can still cook and pack food for me :D
Mum - I love you and thank you that you've always been there for me.
Happy Mother's Day!

Matcha Checkerboard Shortbread Cookies

1-1/4 stick butter, softened
1/3 cup powdered sugar
2 egg yolks
1 tsp vanilla
2 cup flour
1 pinch salt
3 tsp PANATEA matcha

  1. Beat softened butter until light and fluffy. Cream together powdered sugar, yolks and vanilla. Mix flour and salt to the butter mixture until a lumpy dough starts to form. Using your hands, press the lumps and knead until dough is smooth.
  2. Separate dough into 2 balls. Knead matcha into one ball until it is uniformly green. Separate each ball in half again.
  3. For each ball, roll/pat into a long cylinder about 12" and then pat to make 4 sides (like a long square). Arrange them on top of each other to make a chessboard and pat lightly together.
  4. Wrap firmly in seran wrap and pat lightly on a flat surface to make the dough log more square.
  5. Refrigerate for at least 2 hours.
  6. Preheat oven to 360F. With a sharp knife, cut out 1/4" cookies and lay on a baking sheet with parchment paper.
  7. Bake for 9-12mins or until slightly browning on the edges.
  8. Let cool for at least 5 minutes.

Read More

Spring Bloom Cookie Wreaths

Hello Spring! It was an amazingly hot day yesterday in Richmond. I actually broke out into a sweat while walking up to school (sometimes my only exercise ever), and all the pretty pink flowers that bloomed in this one tree had just shriveled up from the heat and fallen off :\ I think it's going to be hot all weekend, which means I need to either get up earlier so I can walk at snail pace and avoid getting pit stains on my scrubs or refuse to raise my arms all day.


I think I was supposed to talk about the beauty of Spring and flowers, but somehow got onto the topic of sweating and pit stains (sorry!). It's also going to be mother's day this Sunday!! The day just reminds me of how expensive flower bouquets can be (and how much I love my mum :P). I think one of our pet peeves is receiving flowers. We'd much rather receive a dozen hamburgers or a cake (my mum says straight up cash please)... such romantics :\ So, I wish I could bake these lemony bright cookies for my mum instead of flowers and give her a humongous hug for being the best mum ever. Unfortunately, she is in LA and if she knows that I've been baking instead of studying, she'll have my head on a plate.


These cookies were inspired by winter holiday wreath cookies made by bon appetite (link below). I've gone an put a spring flair on them with dried flower petals I bought at a loose leaf tea store, poppy seeds and chopped nuts. They're just so pretty and motherly looking! I hope your mum loves them as much as I do!


Spring Bloom Cookie Wreaths
inspired by bonappetite

Cookie dough
1.5 stick butter, softened
1 cup white sugar
2 eggs, room temp
zest of 1 lemon
1 tsp vanilla

2.5 cups flour
1 tsp baking powder
pinch of salt

Toppings
1 cup powdered sugar
2 tsp lemon juice
2 tsp milk
handful of dried strawberries, candied rose petals, dried petal tea herbs
handful of chopped almonds or pistachios
poppy seeds

  1. Cream butter and sugar until light and fluffy. Beat in eggs, lemon zest and vanilla. Mix in flour, baking powder and salt and then knead the dough as it comes together.
  2. Make a smooth ball with the dough, seran wrap and flatten slightly. Place in the fridge for at least 2 hours or overnight (if overnight, let it thaw a little before rolling)
  3. Preheat oven to 400F. Generously flour your surface and rolling pin. Roll out cookie dough to 1/4" thick and cut out wreaths
  4. Bake for 6-10 mins or until the edges slightly brown. Let them completely cool out of the oven
  5. Whisk together in a small bowl, powdered sugar, lemon juice and milk. Dip cooled cookies face down into the icing and let the excess drip. Work quickly to decorate petals, poppy seeds nuts (whatever you like!) on the icing and pressing slightly to make sure it adheres
  6. Let the icing completely dry (may take more than an hour) and serve. Keep remaining cookies in a airtight container and they will last for many days!


Read More

Chocolate Cookie Pine Cones

It's almost Christmas and school's out. I've already caught up on The Mindy Project and watched 1000 youtube videos. I've been in PJs all day and my mane is looking like Lion King's.  'Tis the life! I'm about to board the plane in 5 hours back to LA. Apparently, the forecast is going to be warm and sunny (what else do you expect?). Yay! So excited to eat some home cooking and get me some daily pampering from mum.

I've been baking up a storm, now that I have time, and decided to get a little creative. I did spend too much time on pinterest while I was studying for the final exam :P but at least that time was well spent (maybe?). Here are some cookie sculptures to get you in that christmas spirit :)

Happy happy holidays and I hope your Christmas is filled with warmth, laughter and lots of hot chocolate xoxo


Chocolate Cookie Pine Cones

1 1/4 cup flour
1/2 cup cocoa powder
1 tsp baking powder
1/2 tsp cinnamon
1/8 tsp salt
1 stick unsalted butter, softened
1 cup white sugar
1 egg
1 tsp vanilla

3 Candy canes
1 cup powdered sugar
1/4 cup creamy peanut butter
1/4 cup nutella
1 tbsp butter, softened

  1. In a medium bowl, mix dry ingredients (flour, cocoa, baking powder, cinnamon, salt). Beat butter and sugar until fluffy, then beat in the egg and vanilla. Mix the butter mix and dry ingredients together until it forms a soft dough. Roll between 2 sheets of wax paper to 1/4 inch and refrigerate it for at least 2 hrs
  2. Preheat oven to 360F, roll the chilled dough thinner to 1/4". Make a grid to make 1/2x1/2" squares. Lay them out on a lined baking tray. Doesn't have to be that spread apart because they won't expand much
  3. Bake for 6-9 mins and let cool. They will harden as they cool.
  4. Mix the "glue": powdered sugar and peanut butter, Nutella and butter together and refrigerate for about 10 minutes
  5. Cut candy cane to about 3" tall. Put the glue all over it and stick on the cookies. It helps to create a base on the bottom so it stands and then scoop more glue and add the cookies. Add them more upright as you go along the "spine". You can cut the cookies smaller as you go to the top too. 
  6. Dust with powdered sugar!


Read More
Template Design By Baby in Heels